
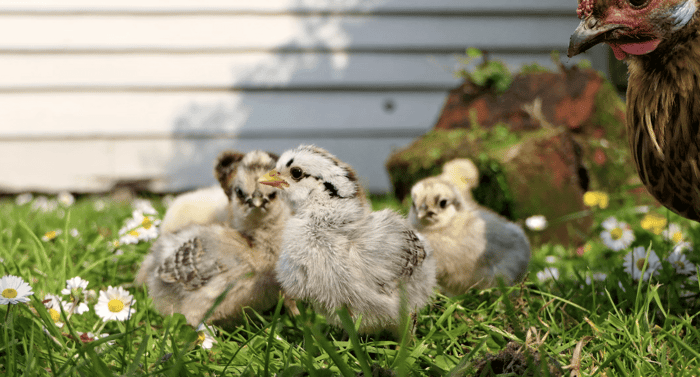
Hatching chicken eggs at home can be an exciting way to expand your backyard flock. With special care and a few key pieces of equipment, you’ll be able to bring baby chicks into the world that thrive and contribute to the vibrancy of your coop.
In this article, we delve into the world of egg incubators, exploring the techniques essential for achieving optimal hatching.
From selecting the correct equipment to navigating temperature, humidity, and turning, join us as we explore how to create the perfect incubation environment for your eggs.
Quick answer
A successful egg incubation requires three precise conditions: temperature at 99.5°F (forced-air) or 101.5°F (still-air), humidity at 45–55% for days 1–18 and 65–70% for the final 3 days (lockdown), and turning eggs 3–5 times daily until day 18. Cheap incubators that can't maintain stable temperature and humidity are the #1 cause of failed hatches — a quality forced-air incubator with an auto-turner is worth the investment.
Select the Right Incubator
Choosing the appropriate incubator is a pivotal step in ensuring that your eggs hatch. While there are many different models available that differ in size, style, and price, you should look for some key features to ensure it meets the specific needs of chicken eggs.
All incubators should have vents for air exchange, as proper ventilation is crucial to maintain a healthy, oxygen-rich environment for developing embryos. Carbon dioxide flows out through these vents, preventing harmful gasses from building up inside the incubator.
Adequate ventilation supports optimal growth, reducing the risk of issues such as malformations or delayed development.
You should also prioritize precise temperature control and an effective humidity management system. These features are crucial for creating an environment that encourages optimal egg development.
A well-regulated temperature ensures the eggs receive consistent warmth, while humidity control is vital for mimicking the natural conditions necessary for successful hatching.
Start With Fertile Eggs
To successfully hatch healthy chicks, it’s crucial to start with viable, fertile eggs. You can usually order fertilized eggs from a hatchery or nearby poultry farmers, but make sure they come from a National Poultry Improvement Plan (NPIP)-certified flock to help reduce any risk of disease.
Select clean, fresh eggs that are free of any cracks or deformities, as these imperfections can impact the chances of hatching. They should ideally be around 0–7 days old, although you could get away with using eggs up to ten days old.
Avoid incubating excessively large or small eggs, as large ones hatch poorly while small eggs produce smaller chicks.
Should your eggs be slightly dirty, it’s important to never wash them or wipe them clean, as this removes the egg’s protective coating and exposes it to bacteria. Any wiping action may also force disease organisms through the pores of the shell.
It’s also essential to store your eggs properly while preparing the incubator. Eggs should be kept at a cool and consistent temperature of around 50–60ºF, with their pointed ends down. Turn the eggs once a day before incubation to help prevent the yolk from sticking to the eggshell.
Set Up Your Egg Incubator Properly
There are some essential preparations to make before starting the incubation process to ensure the optimal development of your eggs and chicks.
Before operating your incubator, wash it with a 10% bleach solution, followed by warm, soapy water. Rinse thoroughly to ensure your eggs are placed into a sanitized environment.
Once the incubator is clean and dry, find a suitable location to keep it. The machine should be away from direct sunlights and drafts, so avoid placing it near windows or doors.
The ideal space for an incubator is a shaded area that remains at a constant temperature of around 99–101ºF. Any sudden temperature fluctuations can negatively impact the development of your eggs.
Switch your incubator on before adding any eggs to calibrate its temperature and humidity settings. This process ensures the accuracy and reliability of your equipment throughout hatching.
Check eggs require the following conditions to hatch:
These conditions mimic those found underneath a mother hen and help the chicks to grow properly inside the shell.
Place an external thermometer and hygrometer at the same level in the incubator as the eggs and leave them to stabilize for at least 30 minutes. Compare the readings on the devices with the incubator settings, and adjust accordingly if there are any differences.
It’s critical to ensure that your incubator remains at the correct temperature and humidity, as even one degree of difference could cause developmental abnormalities or even embryo death.
Regular monitoring and adjusting of these parameters is essential throughout incubation to provide a stable and nurturing environment for the developing chicks.
Day 1: Set Your Eggs

(Image source: Pexels)
“Setting the eggs” simply means placing them inside the prepared incubator. You should plan to set a minimum of six eggs at a time, as the number of eggs that hatch is important for newborn chicks. These birds are flock animals and need companions to be happy.
Setting fewer eggs often results in one or no hatchlings.
Allow your eggs to slowly come up to room temperature first, as placing a 50–60ºF egg into the warm incubator could cause it to crack. This process, known as tempering, helps prevent thermal shock and potential damage to the eggshell.
You should avoid excessively handling the eggs during this period to prevent unnecessary agitation and potential damage.
Once your eggs have reached room temperature, carefully transfer them into the incubator, ensuring they are positioned with the pointed end slightly lower than the broader side. This placement enables the embryo to remain in the proper position for hatching.
Take care to space the eggs evenly within the incubator to allow for adequate airflow and optimal heat distribution. Don’t overcrowd your eggs, as this could interfere with temperature regulation within the machine.
Day 1–18: Turn Your Eggs
After successfully setting your eggs, the incubation process begins.
A crucial element of this process is turning the eggs. Eggs must be physically turned several times each day for the first 18 days to prevent the developing chick from sticking to the shell.
Should you not rotate your eggs, the embryos may become attached to the inner membrane, which makes it difficult for them to position themselves properly for hatching.
A mother hen constantly fusses over her eggs and turns them using her feet. In an incubator, eggs need to be rotated 3 or 5 times per day. This ensures the embryos have equal exposure to heat and nutrients from all sides, encouraging healthy development.
Always turn the eggs an odd number of times each day so that they never rest on the same side for two nights in a row.
If you have an automatic incubator, it should turn the eggs for you, eliminating the need to manually rotate them.
Be sure to always wash your hands or wear clean gloves before handling the eggs to prevent the transfer of skin oils or germs. Also, make sure to rotate the eggs gently and avoid sudden movements that could harm the developing embryos.
Day 19–21: Lockdown
The final three days of the incubation process are known as “lockdown” because you will not open the incubator again until all the chicks have hatched and dried off.
During this period, stop turning the eggs. Your chicks are now fully developed and are positioning themselves inside the egg to prepare for hatching.
Maintain a temperature of 99.5ºF, but increase the humidity to 70%. This higher level of water vapor allows the chick to rotate freely within the egg.
Hatch Day

(Image source: Pexels)
On day 21, you should begin to hear peeping from the inside of your eggs.
The eggs will start to wiggle around, and eventually your baby birds will peck a small hole in the egg and begin to breathe with their lungs. They may rest for 6–12 hours after this, so don’t panic if they seem to not be making any progress.
Allow your chicks to come out of their shells on their own and don’t attempt to help, as you may inadvertently cause them harm.
After all the chicks have hatched, lower the incubator temperature to 95ºF. Wait for them to dry and fluff up before moving them into a brooder, which should already be set up with food and a waterer.
Don’t despair if you still have unhatched eggs on day 21. Some eggs may require additional time for incubation due to variations in development or other factors. Give them until day 23 and then candle any unhatched eggs to see if they are still alive before discarding them.
Enjoy Your New Flock
Hatching chicken eggs can be a rewarding experience with the proper planning and equipment. By investing time and effort into creating the optimal incubation environment, you not only witness the miracle of life, but also foster a deeper connection with your flock.
With patience, care, and a little bit of luck, you’ll soon find yourself surrounded by a thriving community of feathered friends. Enjoy them!
